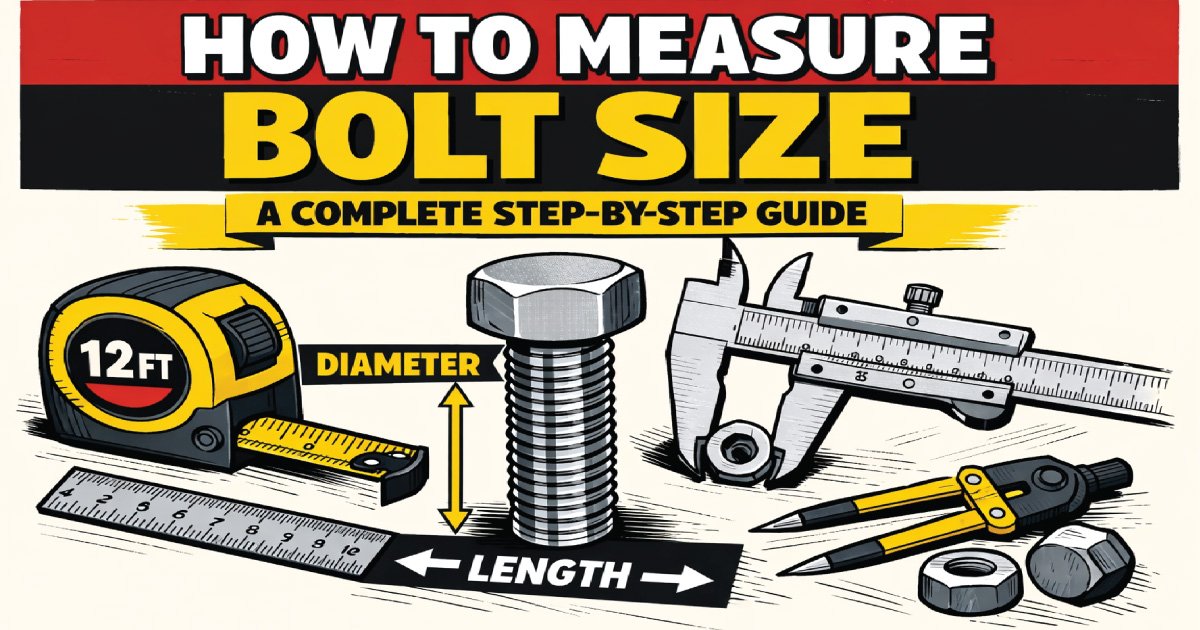
It is important to check the accuracy of a bolt to DIYers and professionals. Whether it is fixing a machine, putting up furniture or automotive work, you will know the exact size of the bolt, this will not only be fitted correctly but will also give a safe working performance and also be found to last long.
In this guide, we will cover everything you need to know about how to measure bolt size, also include tools, techniques, and practical tips.
What Is a Bolt?
A bolt is a fastener that is normally utilized along with a nut or thread hole to fasten materials. Steel, stainless steel, or any other alloy can be used to produce bolts; furthermore, bolts are available of various sizes, thread, and grade.

Understand the basic components of a bolt helps in measure it correctly:
Head: The top of the bolt, which may be hexagonal, square, or round.
Shank: The smooth, unthread portion of the bolt.
Threaded Portion: The spiral ridges that allow the bolt to fasten securely.
Thread Pitch: The distance between threads, which can be coarse or fine.
Diameter: The width of the bolt’s shaft.
Length: The distance from the bolt head to the tip of the threaded end (sometimes measured differently depend on bolt type).
Tools Needed to Measure Bolt Size
Before measure a bolt, make sure you have the right tools. Accurate measurement requires precision instruments. Common tools include:
Vernier Caliper – Measures bolt diameter, thread diameter, and length accurately.
Micrometer – Offers highly precise diameter measurements, especially for smaller bolts.
Thread Gauge – Used to measure thread pitch, both metric and imperial.
Ruler or Tape Measure – Useful for approximate bolt length measurement.
Bolt Chart or Reference Guide – Helpful for cross-reference measurements to standard bolt sizes.
A Complete Step-by-Step Guide on How to Measure Bolt Size
Measure bolt size accurately is essential for DIY projects, automotive repairs, and industrial applications.
This is a complete guide that describes the process of measure bolt diameter, length, thread pitch, and grade to make sure that a person fits everything correctly.
And it will last long, and the fasten will be safe in every project.
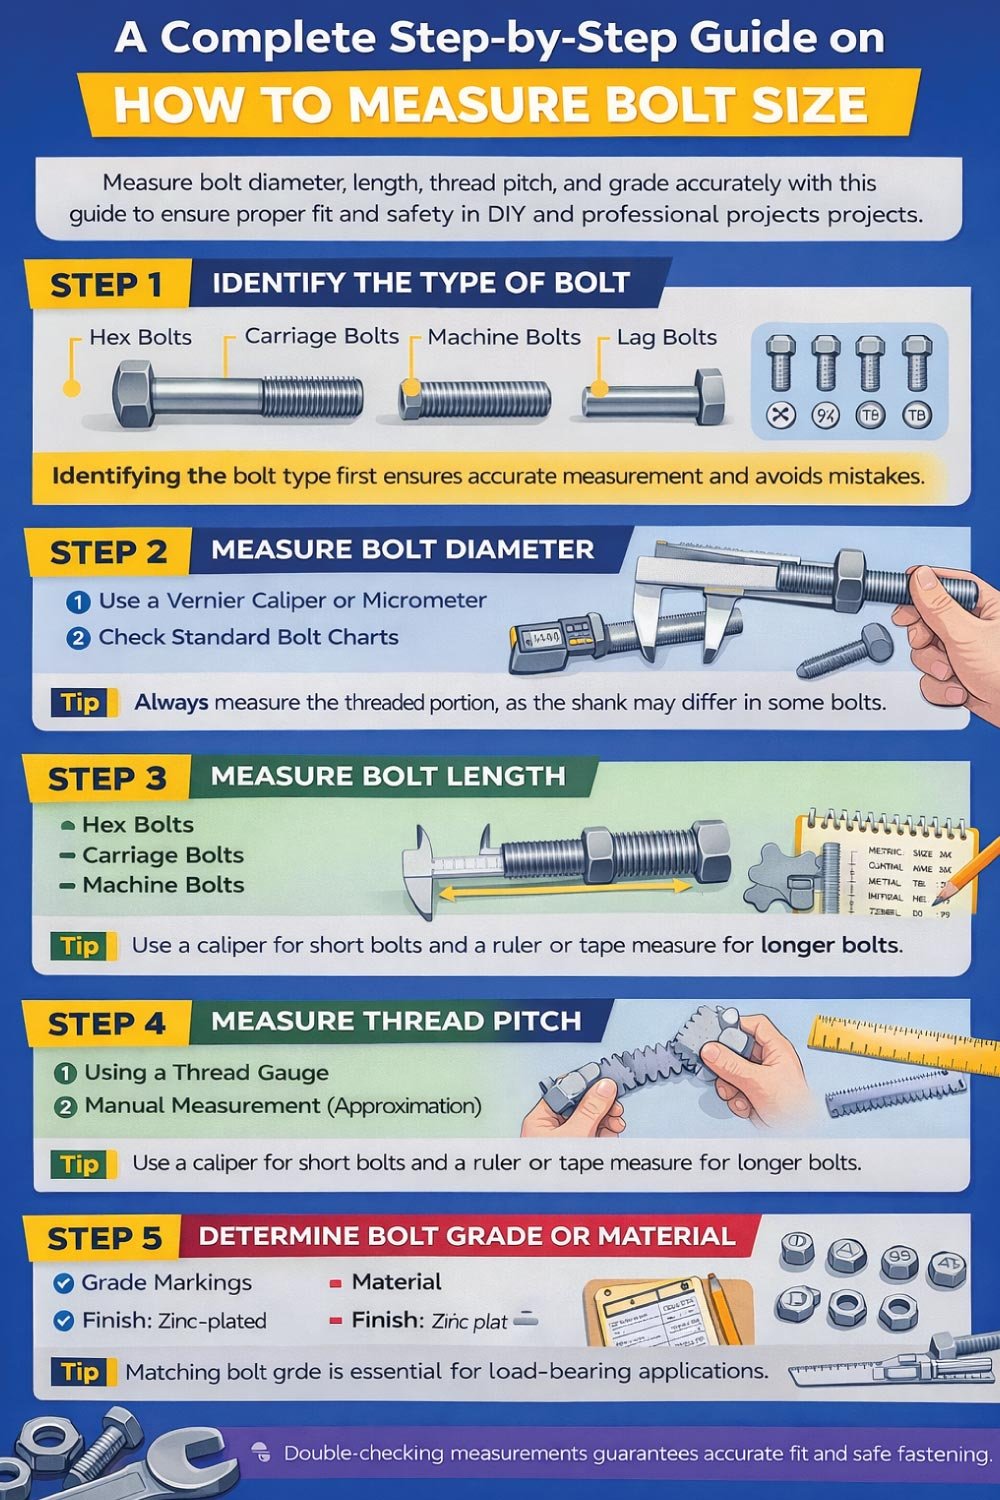
Step 1: Identify the Type of Bolt
Identify the bolt type is the first step in accurate measurement. There are various head shapes and threaded sections of the hex bolts, carriage bolts, machine bolts and lag bolts and all these affect how you measure and record the size of such bolts.
Hex bolts: Common in machinery and construction, usually measured from under the head.
Carriage bolts: Smooth, rounded head, usually measured differently because the head is not included in length.
Machine bolts: Design to fit into tapped holes or nuts.
Lag bolts: Large wood screws, usually measure include the head.
Identify the bolt type first ensures accurate measurement and avoids mistakes.
Step 2: Measure Bolt Diameter
Measure the diameter on the threaded portion, not the head, for accuracy. Using a Vernier caliper or micrometer, record the measurement and compare it with a bolt chart to identify the correct standard size, ensure compatibility and safety.
How to Measure Bolt Diameter:
1- Use a Vernier Caliper or Micrometer
-
- Place the bolt between the jaws of the caliper.
- Measure the outside diameter of the threaded portion (the major diameter).
- Note: Do not measure the diameter across the head—this is only for thickness, not fitting.
2- Check Standard Bolt Charts
-
- Compare your measurement to a bolt size chart to find the corresponding standard bolt size (metric or imperial).
- Example: A diameter of 6 mm usually corresponds to an M6 bolt in metric sizing.
Tip: Always measure the threaded portion, as the shank may differ in some bolts.
Step 3: Measure Bolt Length
Length measure depends on the type of bolt. Hex bolts are measured beneath the head and carriage and lag bolts measure the head also. The ruler or caliper is used in order to bring about accurate and dependable results.
Measuring Length for Different Bolt Types:
1- Hex Bolts
-
- Measure from the bottom of the head to the end of the bolt.
- Example: If a bolt measures 50 mm from under the head to the tip, it is an M6 x 50 mm bolt (if 6 mm diameter).
2- Carriage Bolts
-
- Include the entire length from the top of the head to the tip.
3- Lag Bolts
-
- Measure the total length including the head.
Tip: Use a caliper for short bolts and a ruler or tape measure for longer bolts.
Step 4: Measure Thread Pitch
Measure thread pitch carefully to match the corresponding nut. Take a thread gauge to record accurate values or a ruler to record approximate values. The awareness of coarse or fine requirement of threads is sufficient to have appropriate engagement and avoid damage.
How to Measure Thread Pitch:
1- Using a Thread Gauge
-
- Match the bolt threads with the teeth of the thread gauge.
- Read the value printed on the gauge (e.g., 1.0 mm pitch for metric or 20 TPI for imperial).
2- Manual Measurement (Approximation)
-
- Use a ruler and measure the distance between two consecutive thread peaks.
- This method is less accurate but useful in absence of a thread gauge.
Tip: Ensure you know whether the bolt is coarse-thread or fine-thread. Coarse threads are easier to identify visually as the threads are further apart.
Step 5: Determine Bolt Grade or Material
Check markings on the bolt head to identify grade and material. It is very pivotal that the right grade, finish and alloy type be matched to the load bearing structure and provides the safety and longevity of the operation in construction and machinery.
Grade Markings: Most bolts have markings on the head indicate strength (e.g., Grade 8, 10.9, A2 stainless steel).
Material: Check for steel, stainless steel, brass, or alloy type.
Finish: Zinc-plated, black oxide, or plain steel may affect corrosion resistance.
Tip: Matching bolt grade is essential for load-bearing applications.
Step 6: Confirm Measurements
Triple check measurements so as to avoid errors. Check against bolt charts and test against nuts or tapped holes. Measurement confirmation ensures accuracy and makes sure bolts are suitable to use as per the requirements of application.
After measuring diameter, length, and thread pitch, verify all dimensions:
- Compare your measurements to a standard bolt chart (metric or imperial).
- Check the corresponding nut or threaded hole to ensure proper fit.
- Use multiple measurement tools if possible for confirmation.
This step prevents mistakes and ensures that your bolt matches its application.
Metric vs. Imperial Bolt Measurements
Bolts come either in metric or imperial style, and it is important to know which standard a bolt is made of to measure it correctly and fit. metric bolts use millimeters as a measure of diameter, thread pitch and thread length imperial bolts use inches and thread per inch.
The standard used must be the right one to guarantee the compatibility, avoid cross-threading and secure safe fastening in any project.
| Bolt System | Diameter | Thread Pitch | Length | Example |
|---|---|---|---|---|
| Metric (mm) | Measured in millimeters | Distance between threads in mm | Total bolt length in mm | M8, M10 |
| Imperial (SAE/ANSI) | Measured in inches | Threads per inch (TPI) | Total bolt length in inches | 1/4”, 3/8” |
Common Bolt Measurement Mistakes
Typical errors of measuring bolts: pay attention to those threads part, examine thread pitch, and rely on calibrated equipment. Caution leads to minimized mistakes and correct fitting of the bolts, make the projects safer and of a higher quality.
Measuring the Head Instead of the Thread: Only the threaded portion determines bolt size.
Ignoring Thread Pitch: Two bolts may have the same diameter but different thread pitch. They are not interchangeable.
Using Inaccurate Tools: Cheap rulers or worn-out calipers can cause errors. Precision tools are key.
Measuring Shank Instead of Thread: Some bolts have unthreaded shanks that are wider or narrower than the threads. Always measure threads for accurate bolt size.
Using a Bolt Size Chart
Bolt size charts are a fast source of information on the diameter, thread pitch, compatibility with nuts, and head size.
The measurement process is made simpler through the use of these charts, errors are avoided and standard sizes are easily identified and it is hence easier to choose the right bolt to use in any project.
Bolt size charts simplify the process and ensure accuracy. A typical bolt chart shows:
- Bolt diameter
- Thread pitch (metric or TPI)
- Corresponding nut size
- Head dimensions
Example: Metric Bolt Chart (Partial)
| Bolt Size | Diameter (mm) | Thread Pitch (mm) | Typical Nut Size |
|---|---|---|---|
| M4 | 4 | 0.7 | 7 mm |
| M5 | 5 | 0.8 | 8 mm |
| M6 | 6 | 1.0 | 10 mm |
| M8 | 8 | 1.25 | 13 mm |
| M10 | 10 | 1.5 | 17 mm |
Tip: Keep a printed chart in your workshop for quick reference.
Practical Tips for Measuring Bolts Accurately
Clean bolts, sound instruments and technique are needed to measure bolts accurately.
Applying common sense by following simple advice like measuring at various positions, removing rust or dirt, labeling bolts,
And calibration of tools will yield similar results and enhance productivity and also keep accurate inventory of future projects.
Clean the Bolt First: Dirt and rust can distort measurements.
Measure at Multiple Points: Take measurements at different points along the threads to ensure consistency.
Double Check Tools: Calibrate your calipers and micrometers regularly.
Label Bolts: Once measured, label bolts for future use to avoid repeated measurements.
When to Seek Professional Help
When performing a high precision job like automotive repairs, an aerospace part or industrial machinery, then you must be advised by a professional or adhere to the specifications of the manufacturers.
It is important to measure bolts precisely in these types of applications so that the fitting is correct, safe and the equipment performs optimally and costly errors or mechanical breakdowns can be avoided.
Summary – How to Measure Bolt Size
In any project, it is important to measure bolt size properly to achieve fit, safety as well as durability. By following a systematic approach, you can avoid mistakes, match the correct bolt to its application, and achieve reliable fastening whether for DIY, automotive, or industrial use.
-
Identify the bolt type.
-
Measure diameter using a caliper or micrometer.
-
Measure length from under-head to tip (type-dependent).
-
Measure thread pitch with a thread gauge or ruler.
-
Confirm bolt grade, material, and finish.
-
Double-check measurements and compare to a bolt chart.
-
Use proper tools and avoid common mistakes.
By following these steps, you can confidently measure bolts for any project, ensuring a perfect fit and safe fastening.
Final Thoughts
Measure the bolt size may seem complicated at first, but with the right tools, a systematic approach, and attention to detail, anyone can do it accurately. Proper bolt measurement ensures:
Safety – correct load-bearing capability.
Durability – bolts fit securely without stripping threads.
Efficiency – reduces mistakes and wasted materials.
You can be either an amateur or a professional mechanic, but it is always good to know how to measure bolts. Prepare your tools, use charts, and never fail to recheck your measurements to achieve maximum success.
Also Read:

Engineer Hassan is a seasoned Mechanical Engineer specializing in hardware, fasteners, tools, and precision mechanical components. With over 16 years of hands-on experience in mechanical design, assembly, and maintenance, he creates detailed size charts, installation guides, and tool selection resources. His content focuses on accuracy, safety, and practical engineering solutions, helping professionals, technicians, students, and DIY enthusiasts make reliable decisions in mechanical projects.