Precision measurement is the backbone of engineering, machining, and mechanical work. When accuracy matters down to fractions of a millimeter, a simple ruler or tape measure is not enough. This is where a micrometer screw gauge becomes essential.
If you are new to this tool, it may look confusing at first. But once you understand how it works, reading a micrometer becomes simple and highly accurate. In this guide, you will learn how to read a micrometer screw gauge step by step, along with practical tips, examples, and common mistakes to avoid.
What Is a Micrometer Screw Gauge?
A micrometer screw gauge is a precision measuring instrument used to measure very small dimensions such as thickness, diameter, or length with high accuracy.
It works on the principle of a screw mechanism, where rotating the thimble moves a spindle toward or away from an object. This movement is measured in very fine increments, usually up to:
- 0.01 mm (metric micrometer)
- 0.001 inch (imperial micrometer)
Because of this precision, micrometers are widely used in:
- Mechanical engineering
- Metalworking
- Manufacturing
- Quality inspection
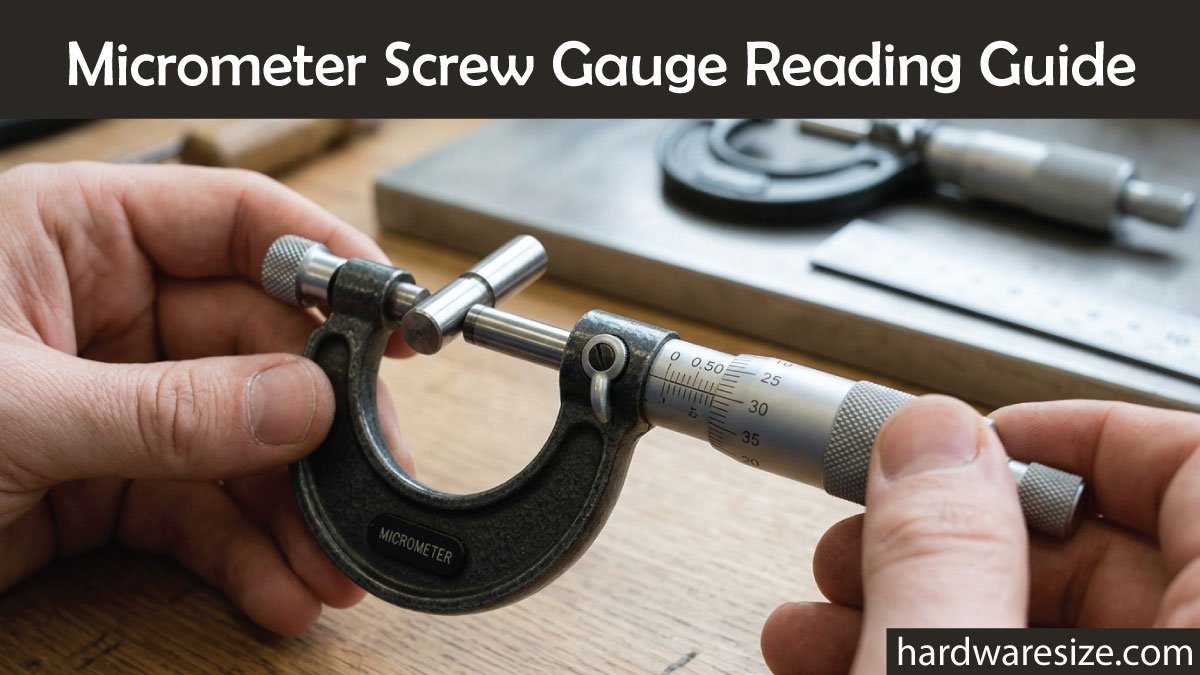
Main Parts of a Micrometer
Before learning how to read or use a micrometer screw gauge, it is important to understand its main parts. Each component has a specific function that contributes to accurate measurement. Knowing these parts helps you operate the tool correctly and improves your precision in mechanical and engineering work.
1. Frame
The frame is the main body of the micrometer, usually shaped like a “C.” It provides strength and support to the entire tool. Made from rigid metal, it holds all parts in alignment and ensures stability during measurement, preventing any bending or distortion.
2. Anvil
The anvil is the fixed measuring surface of the micrometer. It does not move and acts as a reference point when measuring objects. The object is placed between the anvil and spindle, allowing accurate and stable measurement of thickness or diameter.
3. Spindle
The spindle is the movable part that moves toward the anvil when the thimble is rotated. It directly touches the object being measured. Its smooth and controlled movement ensures precise contact, which is essential for achieving accurate and reliable readings.
4. Sleeve (Main Scale)
The sleeve, also known as the main scale, displays the primary measurement in millimeters or inches. It provides the whole number reading before adding finer measurements from the thimble. This scale is essential for understanding the base value of any micrometer reading.
5. Thimble
The thimble is the rotating cylindrical part of the micrometer used to move the spindle. It is marked with fine divisions that help measure small increments. By turning the thimble, you can make precise adjustments and obtain highly accurate readings.
6. Ratchet Stop
The ratchet stop ensures consistent pressure when measuring an object. It prevents over-tightening by applying uniform force on the spindle. This feature helps improve accuracy and protects both the tool and the object from damage caused by excessive pressure.
7. Lock Nut
The lock nut is used to secure the spindle in place after taking a measurement. Once locked, it prevents any movement, allowing you to safely remove the micrometer and read the measurement without losing accuracy. It is especially useful in repeated or precise measurements.
How a Micrometer Works
A micrometer is a precision measuring instrument that works on the screw thread principle, converting rotational movement into very fine linear motion. This allows extremely small distances to be measured accurately. Each rotation of the thimble moves the spindle a controlled amount, ensuring high precision in engineering and machining tasks.
d=n×pd = n \ times p
Where:
d = distance moved by the spindle
n = number of rotations
p = pitch of the screw
This precise movement allows extremely accurate measurements.
Understand the Micrometer Scale
A micrometer provides very precise measurements by combining two scales that work together: the main scale and the thimble scale. These scales help users measure extremely small dimensions accurately, which is essential in mechanical engineering, machining, and precision fitting work where even a tiny error can affect performance.
1. Main Scale (Sleeve Scale)
The main scale is the fixed part of the micrometer located on the sleeve. It is used to display whole millimeter readings and provides the primary measurement before adding fine adjustments from the thimble scale. This scale forms the base reading for any measurement taken with the instrument.
- Displays whole millimeters
- Each small division = 1 mm
- Half-millimeter marks are also visible
2. Thimble Scale
The thimble scale is the rotating part of the micrometer that allows precise fine adjustments. It works in combination with the main scale to measure very small fractions of a millimeter, making the micrometer one of the most accurate manual measuring tools in engineering.
- Divided into 50 or 100 parts
- Each division = 0.01 mm (in most metric micrometers)
Step-by-Step Guide to Reading a Micrometer
Reading a micrometer becomes easy when you understand it step by step. The instrument combines multiple scales to give highly precise measurements. By carefully reading each scale and adding the values together, you can accurately measure very small dimensions used in engineering and machining work.
Step 1: Read the Main Scale
Start by looking at the sleeve, also known as the main scale. This scale shows whole millimeter values and forms the foundation of your measurement. Always identify the last clearly visible number before the edge of the thimble to get your base reading.
- Look at the sleeve (main scale) and note the last visible whole number before the thimble edge.
- Example: If the last visible mark is 5 mm, your base reading is 5 mm.
Step 2: Check for Half Millimeter
After reading the main scale, check carefully for any visible half-millimeter mark. This small detail is important for improving accuracy, as it adds an extra 0.5 mm to your measurement when present. Missing this step can lead to incorrect final readings.
- If a half-mark (0.5 mm) is visible after the whole number, add it.
- Example: 5 mm + 0.5 mm = 5.5 mm
Step 3: Read the Thimble Scale
Next, focus on the thimble scale, which rotates and provides fine measurement values. Find the number that aligns perfectly with the reference line on the sleeve. This value represents very small increments, usually in hundredths of a millimeter.
- Look at the number on the thimble that aligns with the reference line on the sleeve.
- Example: If the aligned number is 28, then:
28 × 0.01 mm = 0.28 mm
Step 4: Add the Readings
Finally, combine all the values from the previous steps to get your final measurement. This includes the main scale, half-millimeter (if present), and the thimble scale reading. Adding them together gives you the exact and precise measurement.
- Final measurement = Main scale + Half scale + Thimble reading
- Example: 5 mm + 0.5 mm + 0.28 mm = 5.78 mm
Example Readings
Let’s understand micrometer screw gauge reading with simple, real-world examples. These step-by-step calculations help beginners clearly see how the main scale, half mark, and thimble readings combine to give the final accurate measurement in millimeters.
Example 1
In this example, the main scale shows 7 mm, and the half-millimeter mark is not visible, so no extra value is added. The thimble aligns with 15 divisions, which equals 0.15 mm. Adding them gives a final reading of 7.15 mm, showing a precise measurement.
Example 2
Here, the main scale reading is 10 mm, and the half-millimeter mark is visible, so 0.5 mm is added. The thimble reading is 40, equal to 0.40 mm. When combined, the final measurement becomes 10.90 mm, giving a highly accurate result.
Example 3
In this case, the main scale shows 2 mm, and the half-millimeter mark is visible, so we add 0.5 mm. The thimble aligns with 05 divisions, equal to 0.05 mm. Adding all values gives a final precise reading of 2.55 mm.
Least Count of a Micrometer
The least count of a micrometer represents the smallest value that the instrument can accurately measure. It is an important factor in precision engineering because it defines the resolution of the tool. A smaller least count means higher accuracy and better ability to measure tiny dimensional differences in components.
Least Count=Pitch Number of Divisions\text{Least Count} = \frac{\text{Pitch}}{\text{Number of Divisions}}
For a typical metric micrometer:
Pitch = 0.5 mm
Divisions = 50
Least Count = 0.01 mm
👉 How to Read Vernier Caliper Measurements (Easy Guide) explains step-by-step how to take accurate measurements using a vernier caliper. Learn main scale, vernier scale, and reading techniques easily. Read the full post to improve precision skills and avoid common measurement errors in engineering and workshop work.
How to Use a Micrometer Properly
Using a micrometer correctly is just as important as knowing how to read it. Proper handling ensures accurate measurements, prevents damage to the tool, and improves consistency. A careful approach helps you achieve professional-level precision in mechanical, engineering, and woodworking tasks.
Step-by-Step Usage
1. Clean the anvil and spindle
Before taking any measurement, always clean the anvil and spindle surfaces. Dust, oil, or debris can affect accuracy and give incorrect readings. A clean surface ensures proper contact between the tool and the object, which is essential for precise measurement.
2. Place the object between them
Carefully place the object between the anvil and spindle. Make sure it is positioned correctly and not tilted. Proper placement is important because even a slight misalignment can lead to measurement errors and reduce the overall accuracy of the micrometer reading.
3. Rotate the thimble gently
Turn the thimble slowly to move the spindle toward the object. Avoid fast or forceful rotation, as this can damage both the tool and the material. Gentle movement helps maintain control and ensures the spindle makes accurate and smooth contact.
4. Use the ratchet for final tightening
Once the spindle touches the object, use the ratchet stop for final tightening. This ensures consistent pressure and prevents over-tightening. The ratchet mechanism is designed to give uniform force, improving accuracy and protecting both the micrometer and the object.
5. Lock the reading if needed
If you need to remove the micrometer while keeping the measurement, use the lock nut. It secures the spindle in place so the reading does not change. This is especially useful when recording measurements or checking multiple parts for comparison.
6. Take the measurement
Finally, carefully read the measurement from the main scale and thimble scale. Ensure your eye is aligned properly to avoid parallax error. Take your time to combine both readings accurately for a precise final measurement result.
Types of Micrometers
Different types of micrometers are designed for specific measurement tasks. Each type is built to measure a particular dimension with high accuracy. Understanding these variations helps you choose the right tool for engineering, machining, and inspection work where precision is very important.
1. Outside Micrometer
An outside micrometer is used to measure external dimensions such as the diameter of rods, thickness of plates, and width of objects. It is the most commonly used type in workshops and manufacturing. Its design allows highly accurate and reliable measurements of outer surfaces.
2. Inside Micrometer
An inside micrometer is designed to measure internal dimensions such as the diameter of holes, pipes, or cylinders. It is used where precision inside measurements are required. This type helps engineers and machinists ensure that internal spaces meet exact design specifications.
3. Depth Micrometer
A depth micrometer is used to measure the depth of holes, slots, or recesses. It has a flat base that rests on the surface while the spindle extends downward. This tool is essential for accurate depth checking in mechanical and engineering applications.
👉 How to Measure Fasteners Without Specialized Tools is a practical guide for beginners to understand bolt, screw, and nut sizes using simple methods. Learn easy techniques with basic tools. Read the full post to improve accuracy, avoid mistakes, and handle everyday mechanical tasks with confidence and precision.
Common Mistakes to Avoid
When using a micrometer screw gauge, beginners often make small mistakes that can lead to inaccurate readings. Avoiding these errors is important for improving precision, protecting the tool, and ensuring reliable measurement results in engineering and workshop work.
1. Applying Too Much Force
Applying excessive force while measuring can damage both the object and the micrometer. It may also compress the material slightly, leading to incorrect readings. Always use gentle pressure and rely on the ratchet stop for consistent and safe measurement.
2. Ignoring Zero Error
Many beginners forget to check zero error before starting measurements. If the micrometer does not read zero when fully closed, all readings will be incorrect. Always calibrate the tool first and apply necessary corrections to ensure accurate and trustworthy results.
3. Misreading the Scale
Misreading the main scale or thimble scale is a common beginner mistake. Even a small alignment error can change the final result. Take your time, read carefully, and ensure both scales are properly aligned before combining the measurement values.
4. Not Cleaning the Tool
Dust, oil, or debris on the anvil and spindle can affect accuracy. Even tiny particles can create gaps and lead to false readings. Always clean the micrometer before and after use to maintain precision and extend the tool’s lifespan.
5. Reading from an Angle
Reading the scale from an angle can cause parallax error, which leads to incorrect measurements. Always view the scale straight from eye level. Proper alignment ensures that the markings are read accurately and the final measurement is completely reliable.
Zero Error and Correction
In some cases, a micrometer may not show a perfect zero reading when the spindle and anvil are fully closed. This is known as zero error, and it can affect measurement accuracy if not corrected properly. Identifying and adjusting this error is an essential step in ensuring precise and reliable readings.
Types of Errors:
- Positive error → reading is above zero
- Negative error → reading is below zero
Correction:
- Actual reading = Observed reading − Error
By applying the correct zero error adjustment, you can eliminate systematic measurement mistakes and ensure that your micrometer gives accurate and consistent results every time.
Applications of Micrometer Screw Gauge
A micrometer screw gauge is widely used in industries where high precision is required. It helps measure very small dimensions accurately, making it essential in engineering, manufacturing, and technical work. Its ability to provide fine measurements makes it a trusted tool in quality and precision-based applications.
1. Mechanical Engineering
In mechanical engineering, micrometers are used to measure the diameter of shafts, rods, and other machine components. These measurements ensure that parts fit together correctly during assembly. High accuracy is important in this field because even small errors can affect machine performance and efficiency.
2. Manufacturing
In manufacturing, micrometers are used for quality control and inspection of finished products. They help ensure that each part meets exact size specifications. This prevents defects, improves product consistency, and maintains high production standards in industries such as machinery, tools, and precision equipment.
3. Automotive Industry
The automotive industry relies heavily on micrometers for measuring engine parts like pistons, cylinders, and crankshafts. Accurate measurements ensure smooth engine performance and safety. Even a slight deviation in size can affect fuel efficiency, power output, and overall vehicle reliability.
4. Metalworking
In metalworking, micrometers are used for precision cutting, shaping, and finishing of metal components. They help machinists achieve exact dimensions during fabrication. This is especially important when working on parts that require tight tolerances and perfect alignment in mechanical systems.
👉 Mechanical Measurement Tools and Their Sizes is a complete guide that explains different measuring tools, their sizes, and practical uses in engineering and workshop work. Learn how each tool works for accuracy. Read the full post to improve measurement skills, precision, and professional understanding of mechanical tools.
Tips for Beginners
If you are new to using a micrometer, learning the correct handling and reading technique is very important. Small mistakes can lead to incorrect measurements, so practice and patience are key. Following a few simple habits can help you build confidence and improve accuracy over time in your measurement work.
- Practice reading with sample measurements
- Use good lighting
- Start with simple objects
- Double-check your readings
- Keep the tool clean and calibrated
Final Thoughts
A micrometer screw gauge is one of the most accurate measuring tools used in mechanical engineering, machining, and precision-based work. At first, it may look complicated due to its dual scales, but once you understand the step-by-step reading method, it becomes much easier and more reliable to use.
With regular practice, you will be able to take quick, precise measurements with confidence. Whether you are a student learning the basics or a professional working in industry, mastering this tool will greatly improve the quality and accuracy of your work.
Remember, precision is not just about tools, it is about how carefully and correctly you use them.

Engineer Hassan is a Mechanical Engineer with 16+ years of hands-on experience in mechanical hardware, fasteners, and workshop tools. He focuses on size selection, thread identification, and measurement, helping users choose the correct components with accuracy and safety.